Converting Arc/Info Coverages: Three Practical Methods (ArcGIS Pro, QGIS, and GDAL)
Arc/Info coverages were once the backbone of GIS data management in ArcInfo workstation and early ArcMap versions. However, ArcGIS Pro does not officially support coverages.
In this article, you'll learn three effective ways to convert Arc/Info Coverages into modern formats (e.g., File Geodatabase, Shapefile or GeoPackage), using:
- A hidden trick with ArcGIS pro
- A graphical method using QGIS
- A command-line solution with GDAL
Software requirement(s):
- ArcGIS Pro 3.0 or higher (Unofficial Method)
- QGIS (GUI Method) version 3.x or higher (tested here with 3.30.2). Includes GDAL with the required AVCBin driver if installed via the official QGIS installer or OSGeo4W.
- GDAL (Command-Line Method) with AVCBin driver via OSGeo4W (tested with 3.6). Required utilities:
- ogrinfo - to inspect coverages contents
- ogr2ogr - to convert to modern formats
Understanding the Coverage Format
An Arc/Info coverage is not a single file but a folder-based dataset containing:
- Multiple binary files (.adf)
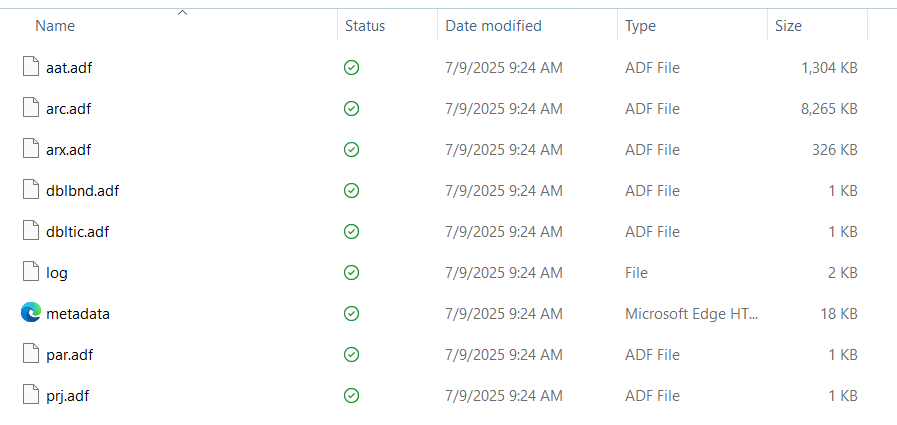
- A required info/ folder shared by one or more coverages.

It contains geometry (e.g., points, arcs, polygons), attributes, and built-in topology. Because it is not a single file, special care is needed when copying or converting.
Note on .e00 Files (Arc/Info Interchange Format)
While Arc/Info coverages are stored as folders with multiple binary files and associated info/ directory, you may also encounter .e00 files in legacy archives. These are Arc/Info Interchange Files - plain text export files created to transfer coverages between systems. An .e00 file is not a working dataset; rather, it's an exported, portable version of a coverage that must be imported and reconstructed before use. Think of it as a .zip for coverages.
ArcGIS Pro does not support .e00 files, but you can convert them using ArcMap or open-source utilities such as e00toavc (part of GDAL suite) to recreate the original coverage structure.
Summary Table
| Feature | Arc/Info Coverage | .e00 File (Interchange Format) |
| Type | Folder-based dataset | Single text file |
| Purpose | Native working format in Arc/Info and ArcMap | Export format for data transfer and archiving |
| Structure | Directory with multiple .adf files + shared info/ folder | Flat, ASCII text file that encodes the entire coverage |
| Can contain topology | Yes | Yes (encoded and restorable) |
| Editable? | Yes (in Arc/Info/ArcMap) | No - Must be imported first |
| Compatible with ArcGIS pro | No | No |
| Compatible with ArcMap | Yes | Yes (must be imported first) |
| Readable by QGIS/GDAL? | Yes (with AVCBin driver) | Not directly - must convert with e00toavc |
Method 1: The "Unofficial" ArcGIS pro Copy Features Trick
Despite official limitations, you can extract coverage geometry using the Copy Features geoprocessing tool - if you know the internal path.
- Go to Analysis > Tools, and search for the Copy Features tool

- In the Input Features box, type/copy/paste the full path to the geometry. You can try polygon, arc, point, or label depending on what the coverage contains
- Set the Output Feature Class to a File Geodatabase or Shapefile

- Run the tool
This method bypasses the lack of UI support and allows you to extract features directly from a coverage into a supported format. Results may vary depending on the structure and integrity of the coverage, but it’s an effective trick for migrating legacy data without using ArcMap.
- You won't see the coverage in the Catalog pane - but Copy Features still works if you specify the right internal component (polygon, arc, etc).
- You can check the metadata to identify which internal components are present in the coverage, or simply guess common types, or inspect them using QGIS or GDAL (See green callouts below).
- Avoid Using OneDrive for Arc/Info Coverages:
- Arc/Info coverages rely on complex folder structures
- These files must maintain precise relative paths and structures
- OneDrive (or Google Drive, Dropbox, etc.) can:
- Sync files asynchronously
- Rename or lock files
- Introduce hidden metadata (.ini or temp files)
- Break folder-level integrity
- Problems That Can Occur:
- “Missing info folder” errors
- GDAL or QGIS failing to recognize the coverage
- Corrupted topology or geometry
- File locks or sync conflicts
- Unexpected read/write permissions
How to Know Which Geometry Type to Use in a Coverage Folder
Arc/Info Coverages store geometry across multiple .adf files, and unlike formats like shapefiles or feature classes, they don’t make it obvious where the points, lines, or polygons live. However, there's a predictable internal structure you can use to figure it out.
Inside your coverage folder (e.g., C:\GIS\coverage\), geometry types are stored in sub-objects. These don’t show up as individual files in ArcGIS Pro, but the Copy Features tool can still access them by name — if you type them correctly.
| Internal Path (suffix) | Geometry Type | Description |
| polygon | Polygons | Area features (e.g., land parcels, water bodies) |
| arc | Lines (Arcs) | Linear features like roads or rivers |
| point | Points | Simple points |
| label | Labels | Label points used for polygon IDs |
| region | Complex Polygons | Advanced multi-part or overlapping polygons |
| route | Routes/Networks | Linear referencing features |
These are not separate files, but internal components of the coverage dataset.
How to Know Which Geometry Type to Use in a Coverage Folder (Continued)
Use the QGIS Browser Panel
- Open QGIS
- In the Browser Panel (left side):
- Navigate to the folder that contains the coverage
- You should see the coverage folder
- Expand the folder:
- You’ll see sublayers like polygon, arc, point, label, etc.
- These names indicate the geometry types

- If you see polygon → your coverage contains polygons
- If you see arc → lines
- If you see label or point → point geometry
Use the “Data Source Manager” Dialog
If you don’t see anything in the Browser:
- Go to Layer > Data Source Manager

- For Source type, choose Directory
- Set Type to Arc/Info Binary Coverage
- Browse to your coverage folder and click Add & Close

The resulting list of layers in the map window shows you what geometries exist.

Use GDAL
- Option 1: If You Have QGIS Installed (Windows). QGIS comes with GDAL and provides a ready-to-use command line:
- Go to Start Menu > search for “OSGeo4W Shell” or Terminal (macOS/Linux)

- Open the shell — it gives you a command line with GDAL ready.
- Try a test command (paths with spaces or special characters need to be properly quoted): ogrinfo --version
- You should see a version like: GDAL 3.6.x, released 2023/01/04
- Inspect the coverage folder: ogrinfo "C:\Path\To\Your\CoverageFolder"
In the screenshot below, I can see that my coverage folder "oc_cbase" contains ARC (Line String),

which is why I added \arc to my path when using the Copy Features tool in ArcGIS Pro.

ArcGIS Pro will recognize the coverage component, even if you can't browse to it in the Catalog pane.
-
Option 2: Install GDAL Directly (Windows)
If you don’t have QGIS, you can install GDAL standalone (Use the OSGeo4W Installer):
- Download OSGeo4W Network Installer: https://www.osgeo.org/projects/osgeo4w/ or https://trac.osgeo.org/osgeo4w/
- Run the installer
- Select Express Install, and Next
- Pick one or more packages to install (gdal, gdal-python), and Next
- Once installed, you can launch the OSGeo4W Shell (repeat option 1 steps)
Bottom Line! When using Copy Features with a coverage:
- You must manually specify the full path including the geometry component (like polygon, arc, point)
- These components aren't standalone .adf files — they are interpreted from the full folder structure
- Use polygon first if you are unsure — it's the most common geometry type in coverages
Method 2: Converting Using QGIS (GUI-based)
QGIS supports Arc/Info coverages via GDAL (if built with the AVCBin driver), and provides a user-friendly way to inspect and convert them.
To export data from an ArcInfo coverage to a shapefile or geodatabase in QGIS, you first need to load the coverage into QGIS. Then, you can export it to your desired format.
- If needed, download and install QGIS (open-source software) from https://qgis.org/
- Loading the ArcInfo Coverage:
- Open QGIS and go to Layer > Data Source Manager (or Ctrl+Shift+V) > Vector tab
- Select Directory as the source type.
- Change the Source Type to "Arc/Info Binary Coverage".
- Navigate to the directory containing your coverage files (not the info/ directory).
- Select the directory and click Add. QGIS will recognize the coverage and load its features.
- Click Close

- Exporting to Shapefile:
- Right-click on the loaded coverage layer in the Layers panel.
- Select Export > Save Features As...

- In the Save Vector Layer as... dialog, choose ESRI Shapefile as the format.

- Select an output file name and location for your shapefile
- Optionally, configure other settings like CRS and encoding
- Click OK to export the data

- You can now open the resulting shapefile in ArcGIS Pro

- Exporting to ESRI File Geodatabase:
- Right-click on the loaded coverage layer in the Layers panel.
- Select Export
- In the Save Vector Layer as... dialog, choose ESRI File Geodatabase as the format.

- You may need to create a new file geodatabase if you don't have one already
- Select an output file name and location for your geodatabase (Basins.gdb here)
- Optionally, configure other settings like CRS and encoding

- Click OK to export the data

- You can now open the resulting file in your file geodatabase in ArcGIS Pro

- Alternatively, you can use the Browser panel
- Right-click on the loaded coverage folder in the Browser panel.
- Select New > Shapefile.. (or Geopackage or ESRI FileGeodatabase)

- Select an output file name and location for your shapefile
- Optionally, configure other settings like encoding, geometry type, Coordinate System...
- Add New Fields...
- Click OK to create the new shapefile

- You can now open the resulting shapefile in ArcGIS Pro

- Ensure that you have the correct directory selected when loading the coverage, as the info/ directory is not the one to select.
- QGIS can handle different types of features (points, lines, polygons) within a single coverage.
- If you need to export only selected features, you can use the "Save Selected Features As..." option.
- For converting multiple layers, you can use Python scripting with the QGIS API.
Method 3: Converting with GDAL (Command- Line)
GDAL is an open-source translation library that supports many geospatial formats, including Arc/Info coverages (if compiled with AVCBin or AVCE00 drivers). It offers great command-line tools (ogrinfo, ogr2ogr) for inspecting and converting coverage datasets. The safest and easiest way is to install it through OSGeo4W on Windows.
- Download OSGeo4W Network Installer: https://www.osgeo.org/projects/osgeo4w/ or https://trac.osgeo.org/osgeo4w/
- Run the Installer
- Select Express Install, and Next
- Pick one or more packages to install:
- gdal
- gdal-python (optional for scripting)
- qgis (optional if you also want the GUI)
- proj (coordinates transformations)
- ogr and any other related tools
The AVCBin driver is built into GDAL installed via OSGeo4W - no need for separate configuration.
- Once installed, you can launch the OSGeo4W Shell
Step 1: Open OSGeo4W Shell
- Go to Start Menu > search for “OSGeo4W Shell” or Terminal (macOS/Linux)

- Open the shell — it gives you a command line with GDAL ready
- Run
ogrinfo --formats | findstr AVC
- You should see:
AVCBIN -vector- (rw+v): Arc/Info Binary Coverage
AVCE00 -vector- (rw+v): Arc/Info E00 (ASCII) Coverage

That confirms the AVCBin driver (needed to read Arc/Info Coverages) is available and ready.
Step 2: Inspect the Coverage (Optional but Recommended)
- Inspect your Coverage. Run ogrinfo "C:\Path\To\Your\CoverageFolder"
This tells you what geometry types are available. In the example below, I have Arc (Lines).
Example Command:
ogrinfo "C:\Users\sarques\Downloads\or-cascades\imap2569dir\base-layers\oc_cbase"

Step 3: Convert to Shapefile (choose the geometry you want)
To convert Arc (Line) features as a shapefile (replace your input and output paths when you copy the code below):
- Run: ogr2ogr -f "ESRI Shapefile" "C:\GISData\output_shp" "C:\GISData\coverage" polygon
Replace the input and output paths and replace polygon with arc, label, or point depending on the geometry you want to extract.
Output format:
-f "ESRI Shapefile"
Example Command:
ogr2ogr -f "ESRI Shapefile" "C:\Users\sarques\Documents\Shapefiles\oc_cbase_shp" "C:\Users\sarques\Downloads\or-cascades\imap2569dir\base-layers\oc_cbase" arc

The conversion was successful!
If you see "Warning 6: Normalized/laundered filed name" like I do, GDAL (and specifically the Shapefile driver) is telling you:
- The original field name in the coverage was: OC_CBASE-ID, but Shapefiles have a 10-character limit for field names
- So it truncated the name to: OC_CBASE-I
This is normal behavior when exporting to shapefiles. No data is lost — just the field name is shortened.
It’s safe to ignore this warning — your shapefile was created successfully. You can rename the field in ArcGIS Pro, QGIS, or Excel. If you want to preserve full field names and avoid these warnings, convert to GeoPackage instead.


Step 4: Convert Arc/Info Coverage to File Geodatabase (GDB) or GeoPackage Using GDAL
Requires GDAL to be built with FileGDB driver support, which OSGeo4W typically includes.
Output format:
-f "FileGDB"
Example Command:
ogr2ogr -f "FileGDB" "C:\Users\sarques\Documents\oc_cbase.gdb" "C:\Users\sarques\Downloads\or-cascades\imap2569dir\base-layers\oc_cbase" arc
If it doesn't work, you'll get the error: "Error 1: Unable to find driver 'FileGDB". It means that your GDAL was not built with File GDB support, which is a proprietary ESRI SDK-based driver. It is optional and not included in many default builds for licensing reasons.

If FileGDB is not available, the best fully writable and modern alternative is GeoPackage.
Output format:
-f "GPKG"
Example Command:
ogr2ogr -f "GPKG" "C:\Users\sarques\Documents\oc_cbase.gpkg" "C:\Users\sarques\Downloads\or-cascades\imap2569dir\base-layers\oc_cbase" arc
GeoPackage:
- Fully writable and portable
- Supported by ArcGIS Pro, QGIS, GDAL
- No file size or field name limitations like shapefiles


How to Open Your GeoPackage in ArcGIS Pro:
- Use the Catalog Pane
- Open ArcGIS Pro
- Go to the Catalog pane (View > Catalog pane if it's not visible)
- Add a folder connection to the folder that contains your .gpkg file

- Right-click the .gpkg, choose Add to Project or expand the .gpkg to see the layers inside and drag individual layers into the map

Optional: How to Convert GeoPackage to File Geodatabase
If you want to convert it into a .gdb for editing and integration:
- Go to Geoprocessing > Feature Class to Geodatabase

- For Input Feature:
- Click the Folder icon
- Browse into your .gpkg and select one or more layers
- Set Output Geodatabase to your .gdb
- Click Run

This will copy the selected GeoPackage layers into your .gdb, preserving schema, fields, and geometry.


Best Practices for Managing Legacy Coverages
- Document Metadata: Before converting, preserve any attribute field descriptions or lineage documentation.
- Back Up Originals: Keep an archived copy of the raw coverage in case of future issues.
- Topological Considerations: Coverage includes built-in topology. When converting, you may want to recreate topology rules manually in a geodatabase.
- Check Projection: Coordinate system metadata may be incomplete or stored in an external .prj file. Double-check and reassign if necessary.
If GDAL or QGIS fail due to unsupported drivers or file corruption, your final resort is to find someone who still has access to:
- ArcMap 10.x
- ArcInfo Workstation
These tools support:
- Coverage to Geodatabase
- Import From Coverage
Resource(s):
https://gdal.org/en/stable/drivers/vector/avcbin.html
https://www.esri.com/en-us/arcgis/products/arcgis-data-interoperability/supported-formats
We hope that this article has been helpful! If you have any feedback or questions, please feel free to send us an email or connect with us for a chat. The NTGISC team is here to assist you further!