
Two methods of Adding Photographs to maps and layers in ArcGIS Online
Several straightforward ways exist to place photographs on maps in a GIS environment. This Knowledge Base article covers two of the most straightforward and easily-implementable methods. Let's start with adding photos to a sketch layer in ArcGIS Online.
1. Adding Photos to a Sketch Layer
Go to www.arcgis.com - ArcGIS Online > Map > Search for and zoom to the following location: 41.0, -75.0. You may have to select among several choices to get a Y value of 41.0 (north latitude) and an X value of -75.0 (west longitude, noting the negative sign).
Once you have selected 41.0 North, 75.0 West, zoom to the result and save the result to a new Sketch layer. Next, access > Popup: Add Media, point to the following URL for a photo taken there: https://www.confluence.org/us/nj/n41w075v3/%70%69%63%35.jpg By placing the photo on the map, you are essentially 'geotagging' it, although you are not altering the image's metadata. See graphic below.
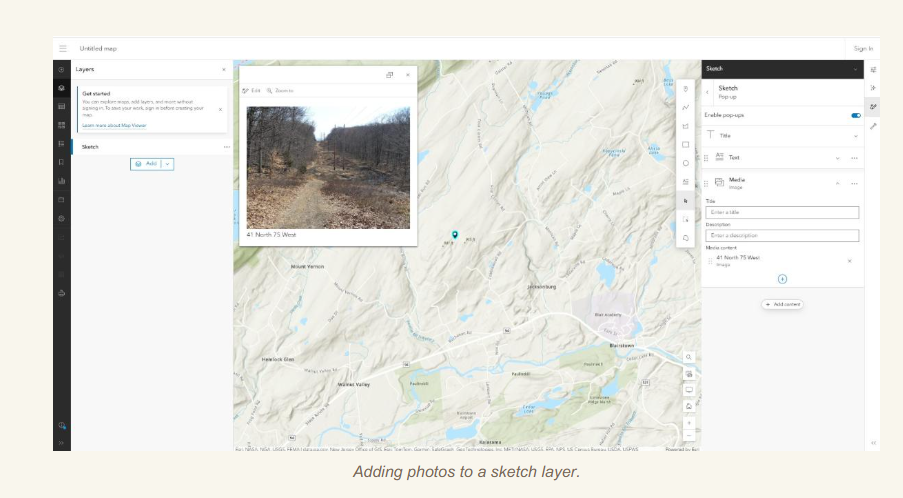
Using the above procedure works fine for a few points, but will be cumbersome for a large number of points. Therefore, in the next procedure, you will consider another method—adding a set of photographs collected in the field via a zip file and the Photos with Location tools.
2. Adding field data via a zip file and the Photos With the Location Feature Layer
Using this procedure is more efficient for a large number of photos, and offers the additional advantage of storing in a feature layer, which is more powerful than a sketch layer.
For this procedure to map your photos in their correct locations, the photos must already be geotagged. Geotagged photos store the location of where the photo was taken; the latitude-longitude location is stored in the image file’s Exchangeable Image Format (EXIF) data; the metadata for the image, which can include other information such as the make and model of the camera, lens information, and more. For example, see below:
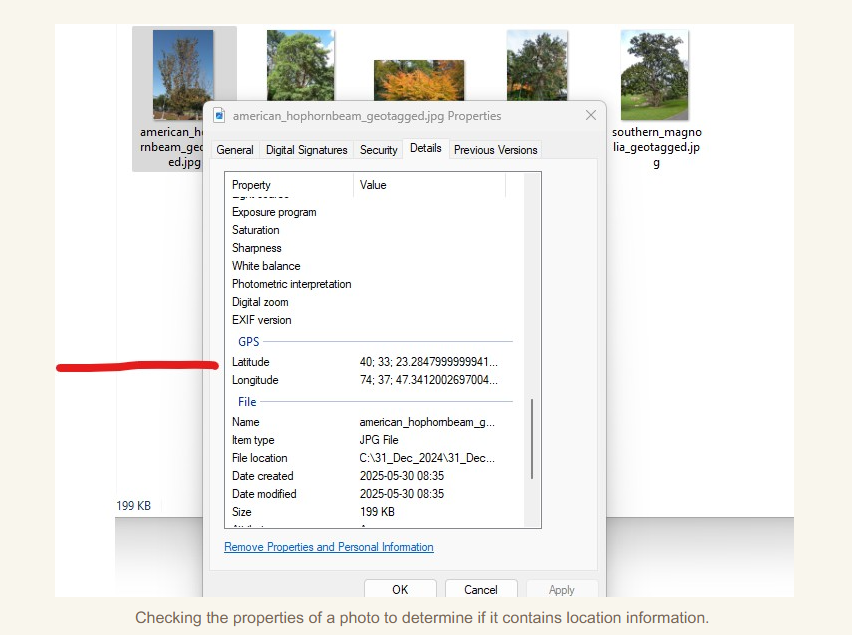
For this Knowledge Base article, a zip file has already been created for you to use as a test case.
Access the layer below: A zip file of geotagged tree images. How was this created?
- A set of photos was gathered into a folder and compressed into a zip file.
- The zipped file was added as a content item to ArcGIS Online and turned into a feature layer. This is one way of creating content in ArcGIS Online.
Geotagged Trees Arboretum Plantings in New Jersey - Overview
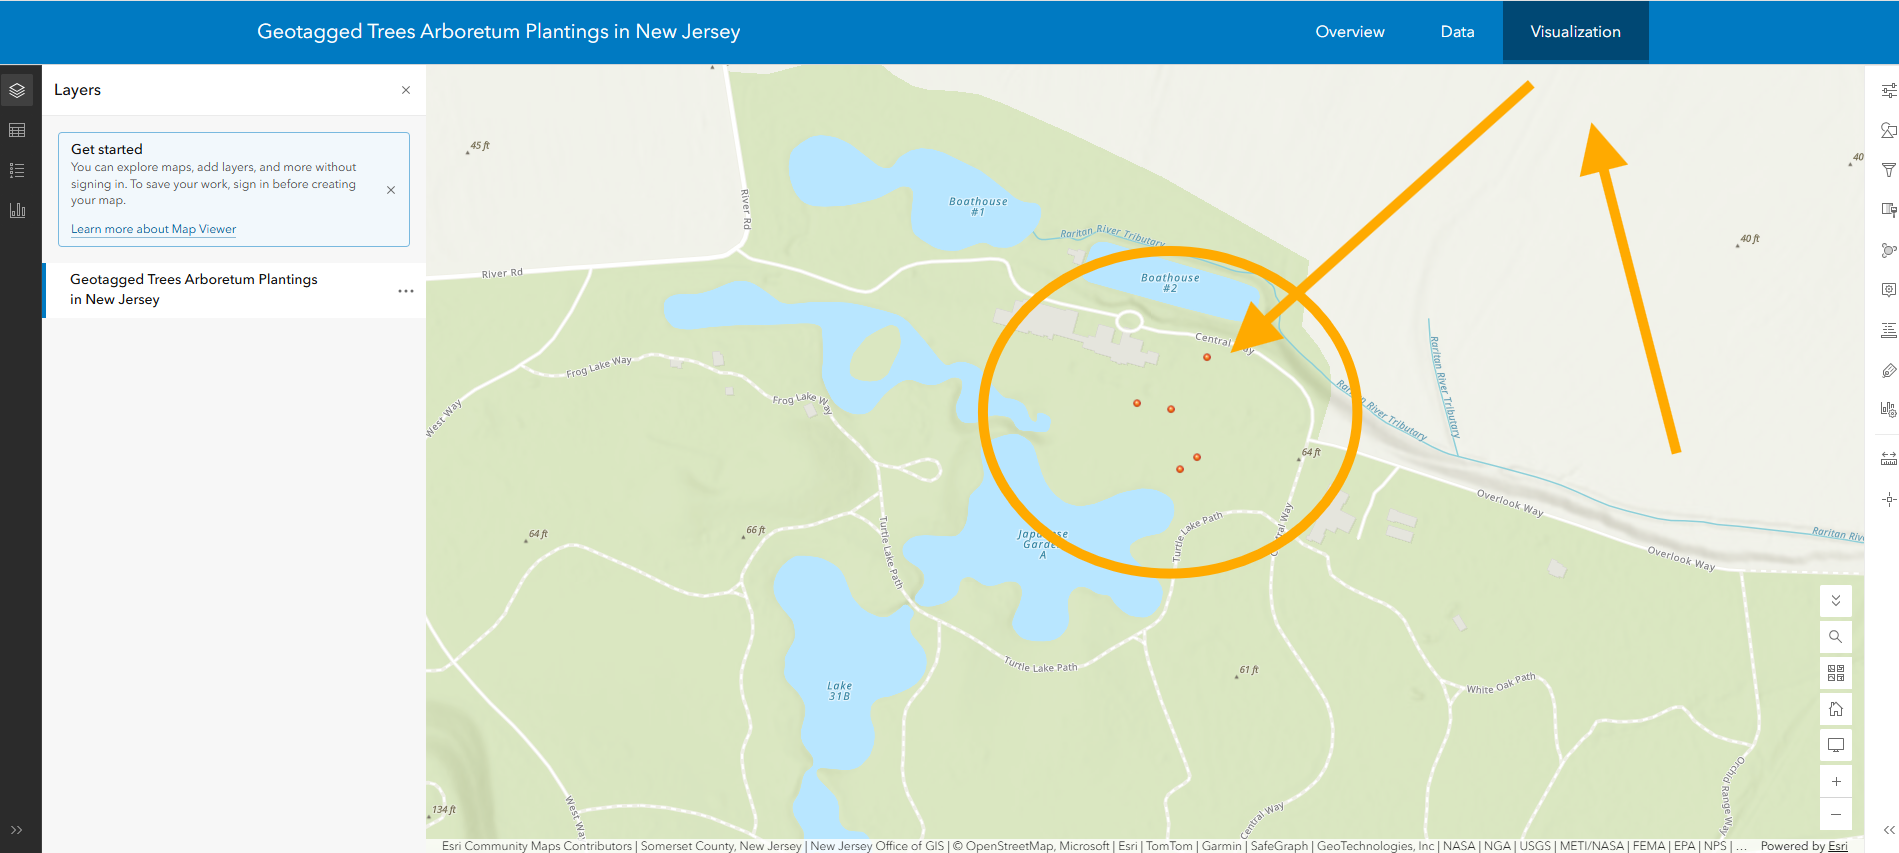
3. When you open the above content, you will be placed in the content item pane: Use Data > Examine the table's fields and note the lack of location fields--the location is not stored in a field, but rather, location information is stored in the EXIF metadata of the photo. Test that location is there by using > Visualization, which will allow you to preview the information on a map (see below).
3. Next, click on Overview in the blue bar > select Open (the layer) in Map Viewer. Make enhancements as you wish (adding labels, changing style, changing the base map, etc.). Save your map; provide some metadata.
See sample result below. How were the tree symbols selected? This is done via Style > Pencil > in this case, government category > List View > search for Tree > Choose > Done. You can also upload your own custom graphic (keep these small if you do so - in the 50 KB range).
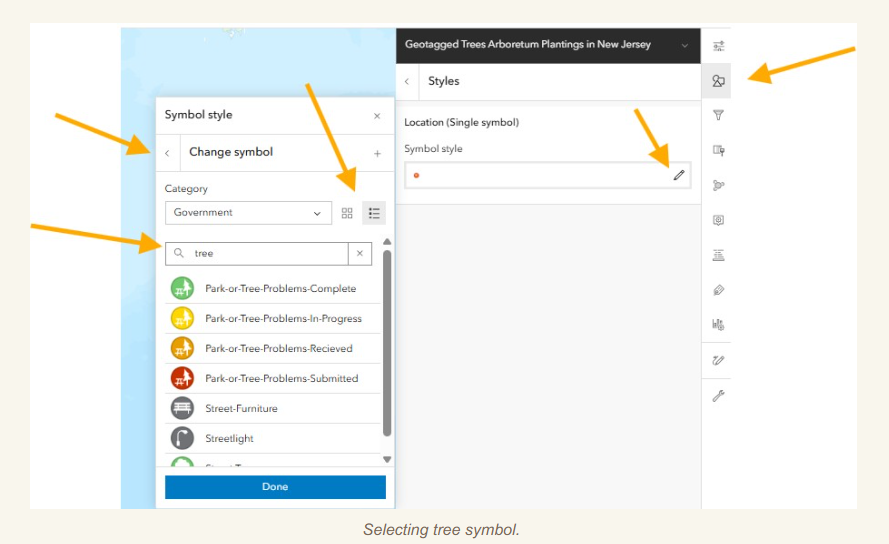
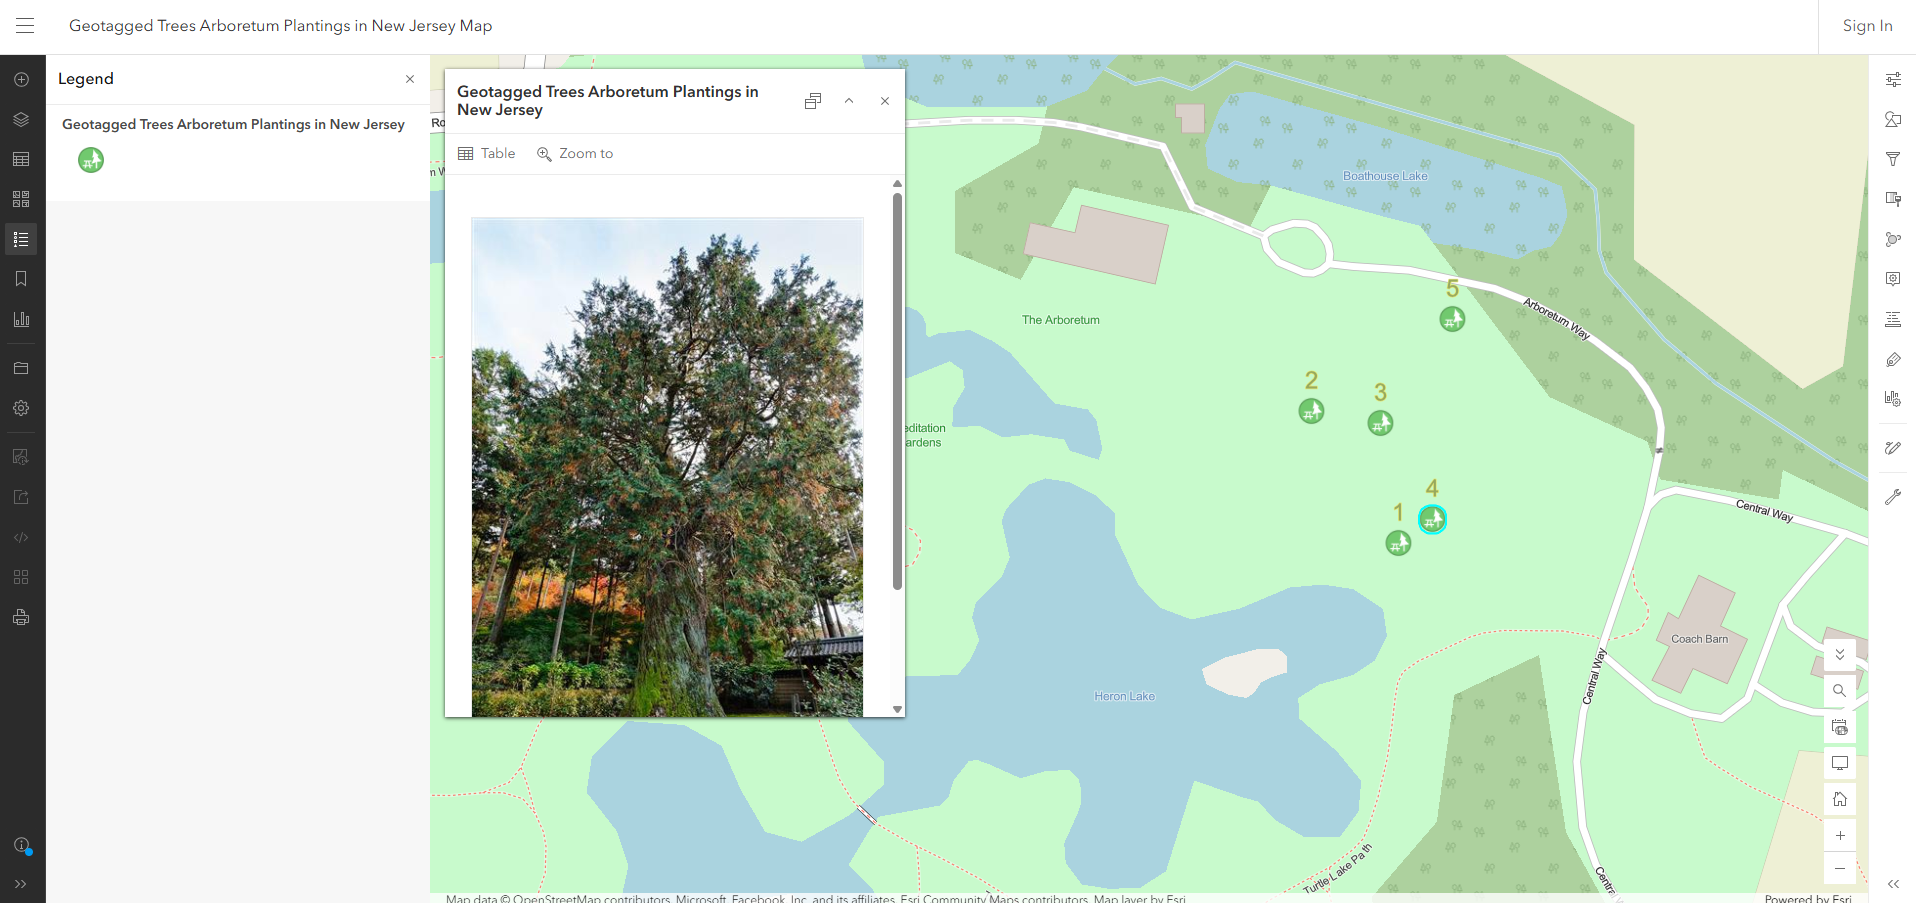
Trees mapped in ArcGIS Online Map Viewer.
For an example of the resulting map from this workflow, open this one:
https://www.arcgis.com/apps/mapviewer/index.html?webmap=317f9195b6614004834a39e98b38a503
Note 1: Neither of the above 2 methods provide the attributes for the information photographed. Methods of adding the attributes along with the photographs are covered in a separate Knowledge Base article. Alternatively, with the workflow above, you could edit the table for the feature layer, add fields, and populate the fields (in this example, with tree height, tree species, tree condition, and so on).
Note 2: ArcGIS Online requires certain types of data to be zipped before uploading to the ArcGIS platform; here in the case of several photographs in a folder, and also when you are working with shapefiles. Shapefiles, as you may recall, are actually comprised of several individual files with shp, shx, dbf, and other extensions, and need to be in zipped format first before uploading to ArcGIS Online.
But what if your photos don't have any location information on them?
Your photographs might not have any location information on them. For example, they may have been scanned from a printed photo, or they may have been taken on a camera without a GPS chip, or the location services may have been disabled on a smartphone when the photograph was taken, or for a handful of other reasons. What if this is the case?
Not to worry! If your photographs do not have this information in their properties, you can manually add it via a variety of tools. Be careful about using web tools to do this; like many web tools, they could contain possible malware. The following tool has been tested by the author of this article and used for many years and in many settings:
Note: Geoimgr offers a fee subscription if you need to geotag a large number of photos. For free, you can geotag a small number of photos each day (currently 5). Geoimgr works by you uploading your photos, indicating where (on a map interface) the photos were taken, and then downloading the output photo written by the geoimgr tool. The output photo will have the geotagging in the photo header; the latitude-longitude location. The output photos will be the ones you would archive in a zip file for this article and workflow.
Remember that the spatial accuracy of your photos will only be as good as your manual methods (such as using Geoimgr) or the spatial accuracy of your device at the time when you took your photos (your camera, phone, or tablet). This in turn depends on the topography (hills, canyons), human built infrastructure (tall buildings, etc.), GPS satellites in view at the time of your field data collection, and other factors (such as how long your device has been outside or free from obstructions, device settings, etc).
The following article includes information for enabling location services for the camera app. Note: The article contains ads; be careful not to click on any ads, not to click on any "start chat", or anything else in the article - the article should be for reading only :-).
I hope the above content is useful and relevant, and I look forward to your questions and comments!
Feel free to share your strategies, in the Tribal GIS forum.
–Joseph Kerski.