How to Create Spatial Joins in ArcGIS Pro
Performing spatial joins in ArcGIS Pro involves six steps.
- Prepare Your Data - Ensure both datasets are in the same coordinate system. If not, project one or both datasets. See: On-The-Fly Projection in ArcGIS Pro
- Access the Spatial Join Tool by opening ArcGIS Pro and loading your datasets. Next, select the Analysis tab and click on Tools to open the Geoprocessing pane. Search for “Spatial Join” in the Overlay Features category and choose the tool.
3. Configure Parameters - Select the target features (the dataset you want to append data to), join features (the dataset you want to take data from), and output feature class (the name of the new feature class). Choose between One-to-One or One-to-Many for the join operation.
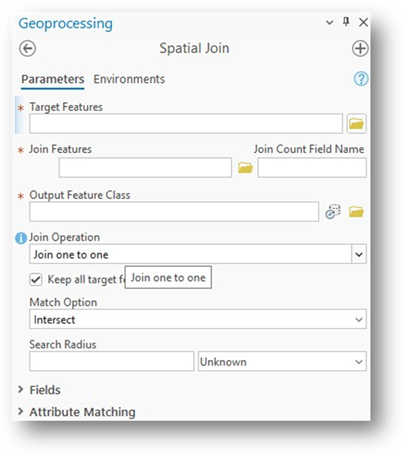
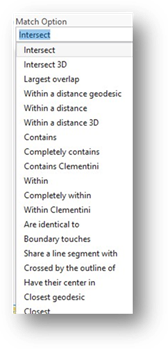
4. You must decide How you are going to capture the joining feature spatially. This will include selecting from a menu of Match Options and the Search Radius and Units used in that search.
5. Run the Tool - Click on the RUN operation to perform the spatial join. The output will be a new feature class containing the target layer’s geometry enhanced with attributes from the join layer.
6. Save the Results - Specify the saving location for the output feature class to save it permanently.
We hope that this article has been helpful! If you have any feedback or questions, please feel free to email us or connect with us for a chat. The NTGISC team is here to assist you further!
Adam Fleenor
Tribal GIS Education Manager